Monday 28 November 2011

European Society for Precision Engineering and Nanotechnology

Euspen Logo
The European Society for Precision Engineering and Nanotechnology or Euspen was founded to bring together industrialists, academics, researchers and industry bodies to form a cohesive and influential organisation representing the precision engineering community as a whole.


Furthermore, the community serves as a great networking platform and nurtures entrepreneurial spirit. Euspen is at the forefront of precision engineering and serves as a great arena to share and learn about new technology and industry trends. 

Euspen was formed in 1999 and is headquartered at Cranfield University, a central pillar of the precision engineering community.

Cranfield Precision is a Euspen Corporate Sponsor and helps to promote Euspen activities and support the precision engineering community.

Saturday 26 November 2011

What is Precision Engineering?

Precision Components
This seems like such a simple question yet it is often blurred or confused by various quotes and uses of the term precision.


Broadly speaking, the classic definition of Precision Engineering is an accuracy of 1x10⁻⁶ which is one part in one million or 1 micron in 1 metre. This is increased ten fold to 1x10⁻⁷ to determine that the level of accuracy falls under the realm of Ultra Precision Engineering.


These definitions in them selves do not mean very much though. These rather broad definitions really just apply to plain dimensional measurements such as the length of a component. These can still be perfectly valid in a precision engineering process, however they are seldom the only categorisation or precision engineering.


More specific definitions of precision that consider aspect ratio or form accuracy are often more useful and valid as a means of stating that something is precision engineered. For example, there are many small so called precision engineering machine shops that do not use temperature control and struggle to achieve tolerances of even a few microns over 100mm or less. This would not be considered precision engineering. Then there are more modern examples such as micro-machining which also can't achieve the 1x10⁻⁶ definition of precision but are accepted as precision engineered components due to their very small size and physical challenges of producing a certain aspect ratio.

Friday 25 November 2011

Machine Tool Error Compensation

Machine Tool Error Motions
A major part of a precision machine tool system is its control system, and more importantly the ability to apply error compensation. With a stiff and repeatable base mechanical system, high resolution transducers and the application of precision metrology it is possible to accurately correct the errors in a machine tool system to give significantly reduced error motions.

By calculation of measured error motions and accurate measurements it is possible to correct for a large number of geometric and dynamic error motions that can occur in a machine tool system.

Accurate machine tool metrology and error compensation is what turns a good machine tool into an excellent machine tool. Cranfield Precision has vast experience in machine tool metrology and in the application of advanced error compensation techniques. This is made possible through our advanced CNC control system, allowing for complex error motions to be effectively compensated.

Monday 21 November 2011

CNC6400 - Advanced CNC Control System

CNC 6400 Control System

The CNC 6400 Control System is Cranfield Precision's flagship CNC Control System.

Cranfield Precision has a history of producing advanced control system technology and was the first to control company to create a camshaft following profile to produce a master cam revolutionizing the automotive industry.


Cranfield Precision's EGB (Electronic Gear Box) allowed for the precise synchronization of multiple machine axes allowing complex motions to be produced very accurately.


There are numerous advantages of having a precision machine tool company with their own CNC control system software rather than using 3rd party vendor control systems. With an in-house software team it is possible to quickly and effectively tailor the control system to meet specific machine and process requirements.


Today Cranfield Precision employs advanced control system techniques and uses modern control hardware capable of producing some very complex and accurate machine tool motions.

Wednesday 9 November 2011

Cranfield Precision are at the 26th Annual Meeting of the American Society for Precision Engineering (ASPE)

The 26th Annual Meeting of the American Society for Precision Engineering is happening between Sunday and Friday the 13th to the 18th of November 2011 at the Denver Marriott City Center Hotel, Denver, CO, USA.

Cranfield Precision is attending the conference and will be represented by Mark Stocker, division manager.

Come and talk to us about your complex manufacturing challenge or general precision engineering related topic.

Visit our web site to learn more about Cranfield Precision - www.cranfieldprecision.com

Wednesday 2 November 2011

The DT40 High Precision Lathe

DT40 - High Precision Lathe
The Cranfield Precision DT40 (DeltaTurn 40) is a high precision lathe comprising a unique machine cell design allowing it to be very compact, stiff and stable.

The DT40 produces high accuracy hard turned components and has been used for automotive, electronic and aerospace parts.

Read an in-depth technical case study on the design and development of this high precision lathe.

High Precision Hard Turning


Tuesday 25 October 2011

Kodak OAGM 2500 Off Axis Grinding Machine

Kodak OAGM 2500 - Off Axis Grinding Machine
The Kodak OAGM 2500 Off Axis Grinding Machine is a classic example of a special purpose machine.


This machine was built in a specially made facility in the UK for proving and acceptance testing before being shipped to the USA.


Machine concept


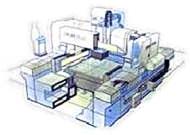
The initial concept of the OAGM 2500 machine shows how Cranfield Precision take a manufacturing problem, create a concept and a design and then turn it into a special purpose machine tool.

Machine Assembly


Assembly of the large machine structure shows the symmetry and nature of the stiff repeatable structure.

Ensuring the surfaces are correctly formed and alignments are correct is a key part of the highly skilled assembly process.


Mirror Segment Inspection


Technicians inspect the mirror segments that are manufactured in a controlled facility on the OAGM 2500 in Kodak's production facility.